Since its version 78, Thunderbird has Lightning calendar built-in. The most popular way to sync Thunderbird calendar with Google Calendars is to use the add-on Provider for Google Caledar. However, it seems there are some issues when trying to add email event invitations to the calendar directly, as it's shown that "No writable calendars are configured for invitations. Please check calendar configuration". The alternative is to connect to Google Calendar using the CalDAV method, as indicated in this answer link. This post expands on that answer. The idea is to obtain a ULR to connect to your Google Calendar via CalDAV, this URL is comprised by a base URL and the Calendar ID.
1. Base URL:
https://apidata.googleusercontent.com/caldav/v2/calid/events
calid will be replaced for the Calendar ID that you want to sync.
2. Getting Calendar ID
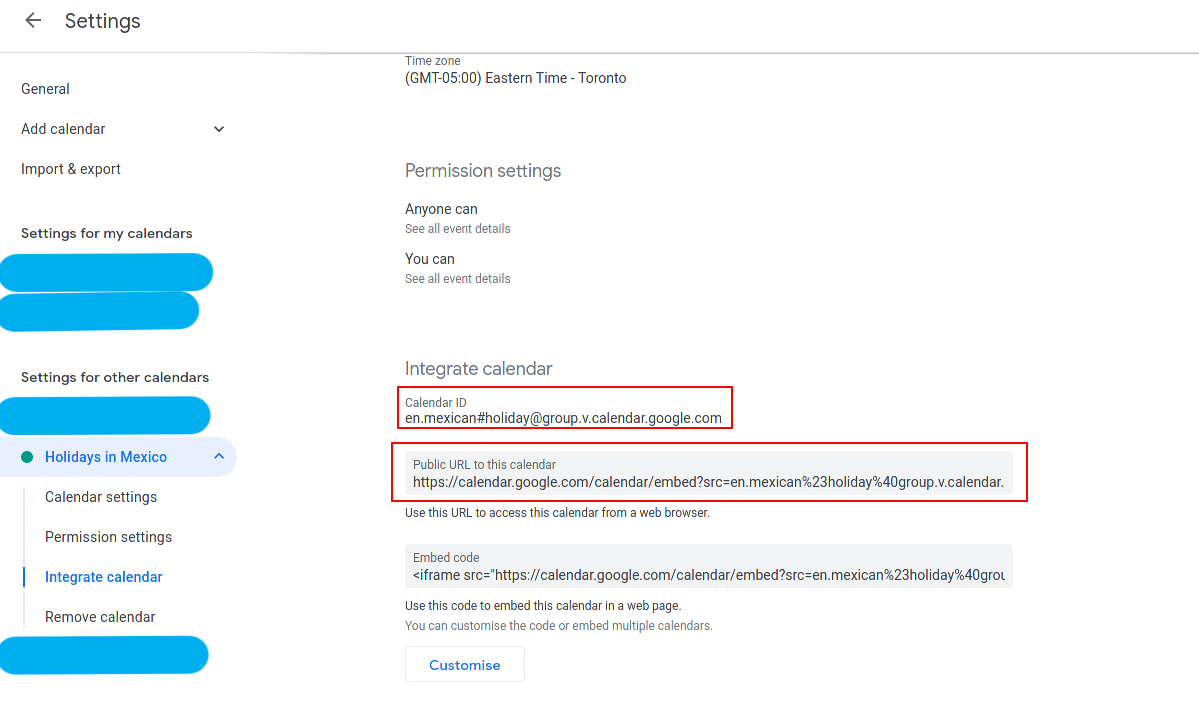
Go to Google Calendar and open Settings (gear icon at top right). In Settings, in the left, click on the calendar that you want to sync, and after click on Integrate calendar. Here you'll find the Calendar ID string. Very often this string has special characters such as #, @, thus it cannot be used like that to make a valid URL. The URL-valid Calendar ID can extracted from src tag in the Public URL to this calendar URL, or URL-encoded.

Getting Calendar ID from Google Calendar Settings.
In this example, the Public URL to this calendar for the Holidays in Mexico calendar is:
https://calendar.google.com/calendar/embed?src=en.mexican%23holiday%40group.v.calendar.google.com&ctz=America%2FToronto,
thus the Calendar ID is en.mexican%23holiday%40group.v.calendar.google.com.
Finally, the full URL for this calendar is created by then using the Calendar ID as calid in the base URL:
https://apidata.googleusercontent.com/caldav/v2/en.mexican%23holiday%40group.v.calendar.google.com/events
3. Create the Calendar in Thunderbird
Create New Calendar, select On the Network. Select CalDav as Format, leave empty the Username, and in Location use the URL created in the previous step. More detailed steps. Lastly, you will be prompted to put your Google credentials.


Comments
comments powered by Disqus