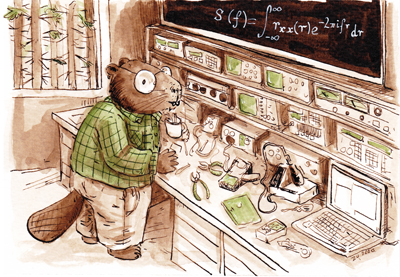
A good day I was going through the available Desklets for Cinnamon, looking for an desklet to display graphs about the current state of the system (CPU, RAM, disks, etc.), although I found the nice desklets such as Simple monitor system, CPU Load and Disk Space, none of them quite do what I need. Thus I resolved to develop the desklet. Because the information to develop a desklet is outdated1, I decided to document the process, this is the first part of that process. How to create a simple desklet. At the moment of writing, Cinnamon 4.4.8 on Arch Linux was used.
1. What is a desklet?
"Desklets are little programs which you can place on your desktop, on top of your desktop background"2. Moreover, desklets as well as other graphical elements in Cinnamon are written in JavaScript3, and use the Cinnamon's JavaScript interpreter (CJS)4. More information about desklets can be find in the official repository https://github.com/linuxmint/cinnamon-spices-desklets.
2. Creating a simple desklet
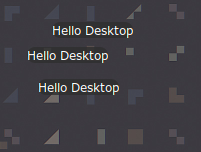
Ok, with the previous information in mind, here a simple desklet is created and explained. When finished, it should look like the image below. The files described in this section can be downloaded from here.

First desklet, it prints "Hello Desktop" and can have multiple instances
First of all, the desklets are located at ~/.local/share/cinnamon/desklets, where each desklet has its own directory.
-
Then, create a directory with the name
PROJECT@AUTHOR, this is the UUID of the desklet. For examplefirst-desklet@rcassani -
A desklet requires at least two files:
-
metadata.json: As it names indicates, this has the metadata for the desklet and additional options such asmax-instancesto allow multiple instances of the desklet.1 2 3 4 5 6 7 8
{ "max-instances": "10", "uuid": "first-desklet@rcassani", "name": "First Desklet", "description": "This is my first desklet", "version": "0.1", "prevent-decorations": false } -
desklet.js: Here is where the JavaScript code for the desklet is. Below there is a simple functional desklet that adds a button on the desktop.1 2 3 4 5 6 7 8 9 10 11 12 13 14 15 16 17 18 19 20 21 22 23 24 25 26 27 28 29 30
const Desklet = imports.ui.desklet;
const St = imports.gi.St;

function MyDesklet(metadata, desklet_id) {
    this._init(metadata, desklet_id);
}

MyDesklet.prototype = {
    __proto__: Desklet.Desklet.prototype,

    _init: function(metadata, desklet_id) {
        Desklet.Desklet.prototype._init.call(this, metadata, desklet_id);
        this.setupUI();
    },

    setupUI(){
      // creates container for one child
      this.window = new St.Bin();
      // creates a label with test
      this.text = new St.Label({text: "Hello Desktop"});
      // adds label to container
      this.window.add_actor(this.text);
      // Sets the container as content actor of the desklet
      this.setContent(this.window);
    },
};

function main(metadata, desklet_id) {
    return new MyDesklet(metadata, desklet_id);
}
-
Constants are declared with const, and cannot be re-declared nor changed. First, the Desklet class is imported from .ui.desklet. The Shell Toolkit is imported at imports.gi.St;, it is a clutter-based toolkit that allows to add GUI elements to the desklet, St documentation can be found here. The function MyDesklet is the constructor for our desklet, it takes metadata (dictionary) with the metadata of the desklet, and desklet_id (int) which is the instance id of the desklet. Using MyDesklet.prototype allows us to add new methods to the object constructors. The method setupUI() contains the behaviour of the desklet, see comments in the code above. Note that it is called inside _init. Finally, the function main returns an instance of MyDesklet
Next steps
By this point there is a working desklet. The behaviour of the desklet still needs to be coded to have all the desired features, will be documented in a future post.


Comments
comments powered by Disqus